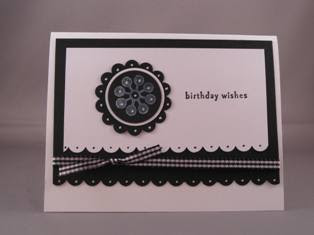
 These are more of the swaps that we did in our Technique Club. These were done by some of my members. If you would like to find out more about my Technique Club CLICK HERE
Background
Background
Wednesday, September 30, 2009
Swaps
 These are more of the swaps that we did in our Technique Club. These were done by some of my members. If you would like to find out more about my Technique Club CLICK HERE
Monday, September 21, 2009
WC Splash Pcs
WC Splash Flower

To get the color on the flower you first take your Shimmer White paper and stamp the image with your Versamark Ink or Whisper White Craft Ink. Then you heat emboss with White Whisper Embossing Powder. Spray the image with water, allowing the water to "pool" in the spaces between the embossed lines. Dip the tip of the Aqua Painter in the ink (from ink refills) then touch the pools of water. And watch it spread thru the water. Start with the lightest color first. Should use at least 2 - 3 colors. Have fun with this. It is amazing technique. If you would like to learn about more techniques join my technique club. Click Here
Sunday, September 20, 2009
Sweet Center

To put this together I added the candy to the cup and then put the square Pumpkin Pie pc onto the cup. Then I snailed around the backside of the Whisper White stamped pc and attached that to the cup. I put Stampin' Up! dimensionals on the back side of this. Then I put this on the Pumpkin Pie cardstock that has been run thru the Big Shot with the "Weave" plate. Then finish by putting this on the Green Galore cardstock and add your ribbon and tag. Thank you for stopping by. If interested in learning this technique and more click here.
Wednesday, September 16, 2009
Toolbox
My daughter asked if I would make her a toolbox for her husband for father's day. He had asked for a life size toolbox of course. I said sure I can come with something that would work for what she needed. She had wrapped this one up and gave it to him as his toolbox that he wanted. (He also got the real life size one also.) So this is what I came up with, thanks to the help of Natasha Hein. The letters were done with the Big Shot Die Cut machine and the Naturally Serif die. The brads and the top piece are from the Silver Hodgepodge Hardware. For the template for the toolbox Click Here.
Saturday, September 12, 2009
Big Coffin
Wednesday, September 9, 2009
3D HALLOWEEN SWAP
 Small Coffin
Tuesday, September 8, 2009
TECHNIQUE TUESDAY SWAP

Wednesday, September 2, 2009
STAMPIN’ UP! HOLIDAY MINI CATALOG

- My Digital Studio: This Stampin’ Up! Easy to use software studio will help you create photo albums, calendars, cards, scrapbooks and much more. It has Stampin’ Up! Exclusive images to incorporate into all your projects. Available October 1st
- Simply Adorned Charms and Chains: This is currently not available to order. Will be released soon. I will keep you posted as of when.


